Standing out in a crowded tradeshow environment can be a challenge. However, well-designed trade show graphics can significantly increase your booth’s visibility and impact. Effective visuals can draw attendees in, communicate your brand message clearly, and ultimately help you achieve your marketing goals.
In this guide, we’ll break down everything you need to know to create show-stopping visuals. We’ll cover the essential elements of trade show graphics, from placement and lighting to choosing the right text fonts and sizes. By the end, you’ll be equipped to design a booth that grabs attention, clearly communicates your brand message, and helps you convert leads into loyal customers.
What is Trade Show Graphics?
Trade show graphics are the essential visual elements that comprise your exhibition booth at a trade show or convention. They silently serve as brand ambassadors, working tirelessly to capture attendee’s attention, effectively communicate your brand message, and prominently showcase your products or services.
Why Do We Need Trade Show Graphics?
Trade show graphics are fundamental for maximizing your return on investment (ROI) at an event. They silently serve as your brand ambassadors, attracting attendees, conveying information, and generating leads.
Grab Attention: In a crowded environment, impactful visuals make you stand out and draw attendees to your booth.
Communicate Value: Effectively showcase your brand identity, message, and value proposition through clear and concise graphics.
Highlight Products: Use visuals to effectively demonstrate the features and benefits of your products or services.
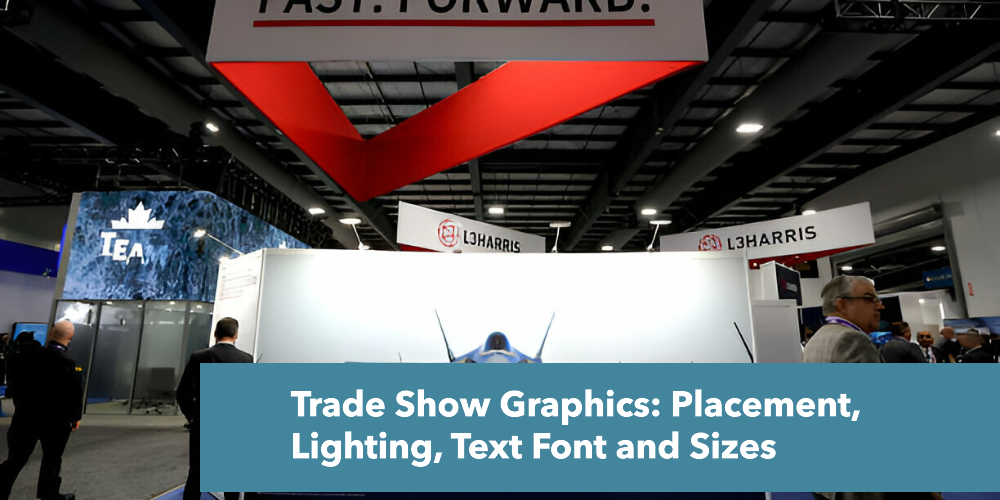
What Should be Our Placement for the Trade Show Graphics?
The strategic placement of your trade show graphics is important to maximizing their impact and attracting attendees to your booth. Here’s a breakdown of key considerations with specific feet ranges to ensure your visuals captivate the audience:
Zones of Visibility:
Long-Range (50- 100 Feet): Capture attention from across the show floor with bold graphics (think simple messaging, contrasting colors, and large logos) on hanging signs, towers, or back walls reaching the maximum allowed height. Be sure to aim for visibility from 50+ feet away.
Mid-Range (10-50 feet): Entice visitors from neighboring booths with informative and engaging graphics placed at eye level (around 6 feet high). This zone is ideal for showcasing product highlights, value propositions, and calls to action.
Short-Range (1-10 Feet): Provide detailed information and product demonstrations within your booth using tabletop displays, roll-up banners, or product displays. Ensure clear and concise messaging readable from 1-10 feet.
Optimizing the Flow:
Left to Right, Top to Bottom: People naturally read in this pattern, so structure your graphics accordingly. Place key messages and visuals on the top left, leading viewers through your content.
Hierarchy of Information: Prioritize the most important elements like your logo, brand name, and core offerings for maximum impact.
What’s the ideal mix of long-range, mid-range, and short-range trade show graphics to maximize visibility and impact?
To understand the solution let’s determine the ideal mix of long-range, mid-range, and short-range graphics for your trade show booth, we need to consider two key factors.
Booth Size:
Small Booth: For a small booth, rely more on impactful mid-range and short-range graphics. A large hanging sign might overpower the space.
Large Booth: You can leverage all three ranges. Use long-range graphics to grab attention from afar, mid-range graphics to draw people in, and short-range graphics to deliver detailed information.
Booth Location:
Corner Booth: Luckily, maximum long-range graphics with hanging signs or truss displays are visible from multiple aisles.
Center Aisle Booth: People will approach from all sides. Focus on impactful mid-range graphics all around the perimeter. End of Aisle Booth: Similar to a corner booth, use long-range graphics visible from the aisle.
Here’s a general recommendation based on booth size:
Small Booth: Focus on 60% mid-range, and 40% short-range graphics.
Medium Booth: Aim for 40% long-range, 40% mid-range, 20% short-range graphics.
Large Booth: Consider 30% long-range, 40% mid-range, 30% short-range graphics.
Will we need permits to specific guidelines regarding hanging signs or booth extensions?
Yes, you most likely will need permits and adhere to specific guidelines for hanging signs and booth extensions at a trade show. Here’s why:
Safety: Large signs and extensions can pose safety hazards if not properly installed. Permits ensure they meet weight and structural requirements.
Fairness: Trade shows want to create a level playing field for all exhibitors. Guidelines prevent booths from becoming obnoxiously large or blocking sightlines.
What Kind of Key Messages Should We Create in Our Trade Show Graphics?
The key messages you should focus on conveying through your trade show graphics are:
Who you are: Prominently display your company name and logo to establish brand identity.
What you do: Clearly communicate your core product or service offering in a concise way, ideally in 10 words or less.
Why they need you: Craft messaging that speaks directly to the needs and pain points of your target attendees, highlighting how your solutions can benefit them.
How to Choose the Best Images for Your Trade Show Graphics?
Choosing the best images are the important element of impactful trade show graphics. But with so many images to choose from, selecting the best ones can feel overwhelming. Here’s how to make the right choice:
Align with Your Brand Identity: Your graphics should be an extension of your brand. Choose images that reflect your brand’s personality, values, and target audience. Consider color palettes, styles, and emotions you want to evoke.
High Resolution is Essential: Large trade show displays require high-resolution images to avoid pixilation and blurry visuals. In general, high-resolution images for print are considered to be 300 DPI (dots per inch) or more. Ensure your chosen images can be scaled to the desired size without losing quality.
Focus on Impact: Your graphics should grab attention from a distance. opt for bold, clear images that tell a story or showcase your product in action. People walking by should be able to understand the message instantly.
Think Emotion: Images have the power to evoke emotions. Choose visuals that resonate with your target audience and create a positive connection with your brand.
Source Legally: Copyright infringement is a serious issue. Only use images you have the rights to, or source them from reputable stock photo websites with appropriate licensing.
What are the Ideal Sizes for Our Trade Show Graphics?
The ideal sizes for your trade show graphics depend heavily on their chosen placement strategy. Here’s a breakdown to help you determine the best fit:
Backwall Displays: These are large, eye-catching displays forming the backdrop of your booth. Standard sizes typically range from 8′ x 10′ to 10′ x 20′, though some vendors offer custom dimensions. Consider the size of your booth and ensure the chosen back wall doesn’t overwhelm the space.
Tabletop Displays: Ideal for smaller booths or showcasing specific products. Common tabletop banner sizes include 36″ x 80″ and 60″ x 80″. Remember, tabletop displays compete with surrounding booths, so consider a size that provides clear visibility.
Hanging Banners: Used to maximize vertical space and grab attention from a distance. Standard sizes range from 3′ x 6′ to 10′ x 8′. Ensure the banner size aligns with the height restrictions of the venue and doesn’t obstruct attendee flow.
Pop-Up Banners: Portable and retractable displays, ideal for quick setup and single-person operation. Common sizes include 33″ x 80″ and 60″ x 80″. Choose a size that complements your booth layout and allows for clear messaging.
Floor Graphics: Eye-catching vinyl decals applied directly to the floor. Typical sizes range from 3′ x 3′ to 10′ x 10′. Strategically place these graphics to guide traffic flow or highlight specific products but avoid obstructing walkways.
A-Frame Signs: Double-sided, portable signs ideal for booth entrances or directional signage. Standard sizes include 24″ x 36″ and 36″ x 60″. Choose a size that provides clear visibility from both sides without blocking booth access.
How Big Should be the Font Size For Our Trade Show Graphics?
1 inch of font height for every 3 feet of viewing distance: This means if people will be standing 6 feet away from your booth, your text should be at least 2 inches tall.
Close Viewing (Tabletop displays): Minimum font size of 36pt (around 0.5 inches). This is for information attendees will be reading while standing right next to the display.
Mid-Range Viewing (Banners, Pop-up displays): Minimum font size of 72pt (around 1 inch). This is ideal for elements like headlines and key messages that need to be easily readable from a moderate distance.
Long Viewing Distance (Large Backdrops): Minimum font size of 144pt (around 2 inches) or even larger. This ensures crucial information like your company name or a captivating tagline is visible from a distance and grabs attention.
Graphic Size: The size of your actual trade show graphic also plays a role. A smaller graphic can’t accommodate a super large font size without looking overwhelming.
How To Use Our Lighting in Our Trade Show Graphic Effectively?
Effective lighting can elevate your trade show graphics from ordinary to extraordinary. Here’s how to strategically use your lighting to maximize their impact:
Highlight Key Elements: Use spotlights or directional lighting to draw attention to important messages, logos, or product displays within your graphics. This creates a focal point and guides attendees’ eyes through the information.
Backlighting: Backlighting fabric displays, signage, or even logos with LED light panels creates a visually striking effect. This technique makes the graphics appear to pop out and ensures they are readable even in a brightly lit hall.
Set the Mood: Consider the overall mood you want to create with your lighting. Warm white lighting creates a welcoming and inviting atmosphere, while cooler tones can evoke a modern or high-tech feel. Adjust the color temperature of your lights to complement your brand identity and graphic design.
Avoid Glare: Ensure your lighting doesn’t create glare on any reflective surfaces within your graphics. This can make it difficult to read and detract from the overall presentation.
Maintain Consistency: Maintain consistent lighting throughout your booth. Avoid harsh contrasts or spotlights that create shadows in unwanted areas.
Comply with Regulations: Always follow to the trade show organizer’s lighting regulations. These may specify wattage limitations, placement restrictions, or safety guidelines.
Which Lighting Position is Best for the Trade Show Graphics?
Top and side positions are considered to be the best lighting position for the trade show graphics.
What are the weight and size limitations for shipping our trade show graphics?
The weight and size limitations for shipping trade show graphics vary depending on the carrier and shipping method:
UPS and FedEx have the following domestic size limits:
- Combined length and girth: 165 inches (419 cm).
- Length: Up to 108 inches (274 cm).
- Maximum weight: 150 lbs (68 kg).
- FedEx Express international services allow packages up to 108 inches (274cm) in length and 130 inches (330cm) in length and girth.
- FedEx Ground and Home Delivery allow packages up to 108 inches (274cm) in length and 165 inches (419cm) in length and girth.
- For LTL (less-than-truckload) freight shipments, individual pieces should ideally be no more than 94 inches tall and wide to fit through the standard 96-inch roll-up door.